Building an eBike
Summary
- I had wanted an electric bicycle for awhile, but fully-integrated units that I found were really pricey.
- Conversion kits seemed like a decent option, but I was worried that it would be too much work. It turned out that there are kits out there that can be installed with minimal effort. A word of caution: don’t expect great documentation :)
- I was able to, without even the bicycle to convert, build a fully-functional electric bicycle for a little over $1,000.
Introduction
The lease on my truck is concluding soon and I’ve decided I would like to try and go without a personal vehicle for a time. With the new move to Oak Park, CA, I am only a few miles from work and could easily ride a bike. Well, at least I could have before my fall a few years back.
I can still ride, but with more difficulty than I’d prefer. It’s just not as much fun as I’d like it to be; my right foot requires constant readjustment and focus to push against the pedal. These difficulties got me thinking about some sort of electric concept. But, it turns out, manufactured electric bicycles from brands that I recognize and trust can run upwards of $14,000! That’s way outside of my price range. This got me thinking about alternatives, such as conversion kits. The timing was pretty perfect, actually. I was thinking pretty seriously about conversion kits when I saw a work colleague with an electric bicycle he had built. His bicycle was a Specialized mountain bike, front suspension only, built using a Bionx kit. Despite the fact that it was a conversion, it looked really simple and clean. It didn’t require any machining or drilling for the mounts; it seemed to just slap on the existing bicycle with minimal effort. My interest was piqued, so I decided to do some research.
Well, as it turns out, Bionx kits like this one are expensive. To be honest, my interest started to wain. I needed to evaluate what my pain-point was for this project, dollar-wise. It seemed to me that $1,000 was a nice round number, with a pad of +/-$100 for unexpected expenses that always pop up. I decided I was comfortable with this investment for a project that I deemed part transportational concern and part hobbyist amusement.
I should mention here that, at this point in time, I didn’t even have a bike to build from. I had just recently gotten rid of both my road and mountain bikes for reasons mentioned previously, i.e. it was no longer enjoyable for me to ride. So, when I went looking for a conversion kit, I didn’t have to discriminate for what kind of bike it was for; if I really liked a kit that was only available in 700C, I could find a 700C wheelset bicycle on Craig’s List. After some basic Google searches, I struck proverbial gold. This kit by Dillenger was almost 40% off, had a roughly 60 mile range per charge, and had everything needed in the box. With the $630 price tag, I figured I had enough budget pad to continue with the project, so I ordered it.
Now, while I waited for the kit to ship, I started trawling Craig’s List for the perfect bike. Or, at least the most perfect bike that Craig’s List could offer. I found this great late-2000’s Trek 1000:
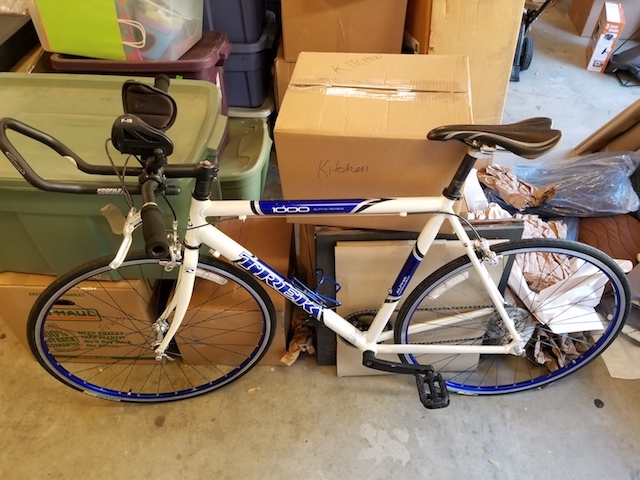
It was the right size, had been well-cared for, and was mostly stock. It was also single-speed. From what I had read, this was key. With electric bikes that have front wheel motor units, i.e. not mid-drive, no additional gearing is required. To eliminate maintenance concerns and overall complexity, I decided that I preferred a single-speed. The guy was asking $220, which was overpriced, we bartered and settled on $180. I still felt this was a little overpriced, but the bike was in great condition, had been recently setup professionally, and was the correct size. I figure that I effectively paid $120, when accounting for the cost I would have incurred if I had to take the bike to a shop to get a tune-up.
Around one week went by and I noticed that my PayPal account had been charged by Dillenger, but I had received no shipping notice. I was starting to get concerned, so I emailed the customer service center and, before I got a reply, the kit arrived at my front door. Awesome! I was now ready to start the build.
The Build
Required Tools

The tools I ended up needing were:
- Snips
- Blade
- Pliers, needle-nose and adjustable-hinged
- File with multiple attachment heads
- Crank Bros. bike multi-tool
- Tire Lever tool
- Wrenches, crescent and torque
- Zip-ties, not-pictured
I used different zip-ties than the ones provided; I thought that those included were too brittle.
Step 0: Preliminaries
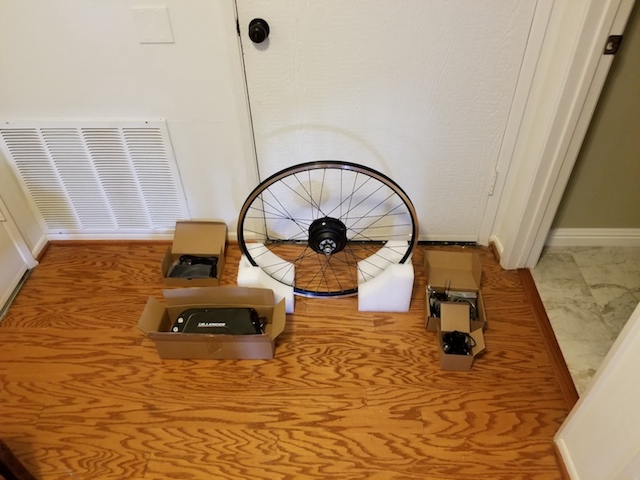
I opened the conversion kit’s box and was a bit disheartened to find no instructions. Seriously?! Not only were there no instructions, there wasn’t even a piece of paper with a URL to the instructions! This, I think, is terrible form. Dillenger included a packing slip with all contents the box should contain and safety documents for the battery and charger. That was it. After some searching on the Dillenger website, I found the appropriate documentation for both the kit and display. I followed the instructions only cursorily, as I found them to be poorly phrased, confusing, and full of grammatical errors. I don’t want to derail the whole conversation, but proper documentation of a manufactured product that requires end-user installation shouldn’t be too much to ask for and yet it oftentimes is. To be clear: proper documentation, to me, means
- A hard copy of the installation instructions is included with the shipped product
- A clear definition of the required tools and other prerequisites for the installation
- Clearly worded, concise steps to complete installation.
Dillenger has dropped the ball on all of the bullet points; the copy that I had to go out and find was poorly worded and spent too much time on diversions about the tech in the system. I get it, it’s cool tech, but enough about the Hall Effect sensor already…
My first steps were to strip the handlebars, remove the front wheel, and prepare it for the actual install.

After years of repairing flats on trails, I’ve learned that there is no tire better than GatorSkins. This is where I incurred the first additional expense: $167 for rim tape, tubes, tires, and wheel levers. Ouch, this was almost what I spent on the whole bike. Oh well, after installing GatorSkins on my Scott Speedster, I went from about a flat per week to no flats ever again. I’d say that my previous experience justified the additional expense.
The rear wheel was properly setup already, so I simply removed the old tube and tire and replaced them. After that, I inflated the tire to ~60 psi. This, I’ve found, is an adequate test pressure for new tires; it tests the install under a high enough pressure to ensure proper install.
After redoing and remounting the rear wheel, it was time to begin the actual install.
Step 1: Front Wheel Setup
I added rim tape to the wheel. The instructions claimed this was recommended but not required. I would highly suggest applying rim tape to a new wheel; this reduces chance of metal from a wheel spoke puncturing your tube. After the rim tape, I repeated the same procedure I had just gone through on the rear wheel.
Next, it was time to mount the front wheel. This is where the strength of uniformity among bicycle manufacturer specifications became apparent.
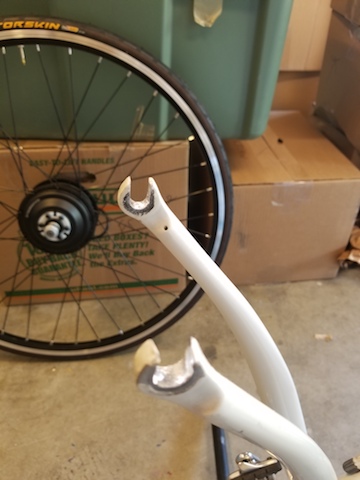
Front dropouts: 10mm clearance between "hooks" on each dropout and 100mm clearance between dropouts is desirable
The 700C conversion kit claims that it can work on any bicycle that has about 10mm of spacing in the front dropouts, with about 100mm in between. This is common among most, if not all, bicycle manufacturers. I still think that it is so cool that a bicycle made over 20 years ago, as well as bicycles made today, can be converted into electric bicycles using a kit.
The wheel didn’t drop in immediately. Despite the commonality in specifications, there is still the matter of variation between manufacturer’s capability in meeting those specifications. This wasn’t a big deal. The instructions did say that the front dropouts may require filing in order fit the front wheel. I didn’t have a file, so I incurred another $18 in expenses getting one.
The filing was manually intensive, but after about a half-hour, the wheel dropped right in.
Step 2: Mounting the Cradle
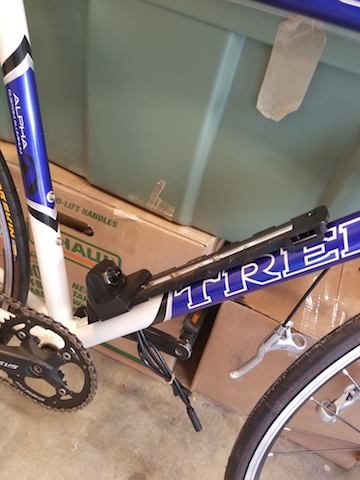
The battery assembly shipped with the battery already mounted on the cradle. I had to spend some time just figuring out how to separate the battery from the cradle. Again, I may be overstating by this point, proper documentation could have been very helpful here.
The cradle mounted easily to the water bottle tapouts.
Step 3: Mounting the Display and Peripherals
By this point, all of the real labor was over. What remained was just finding appropriate mounting locations for the display, the pedal assist controller, and the all-important throttle. This only took a matter of minutes, most of which was spent fussing over exact locations. This is where the one-size-fits-all mentality was a bit frustrating to me; I couldn’t get the exact fit that I wanted. Oh well, it still looked pretty good.
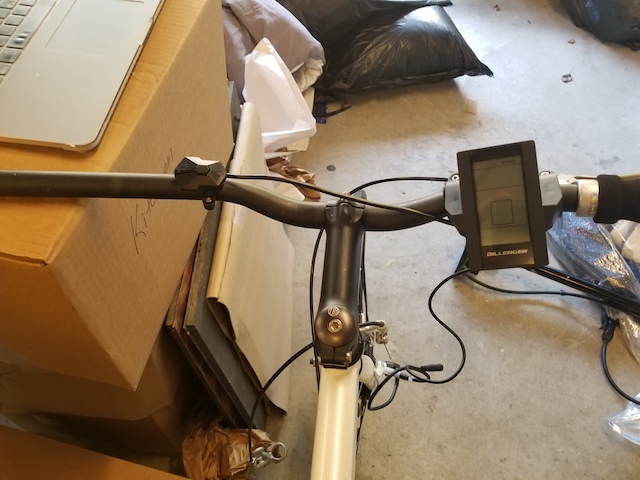
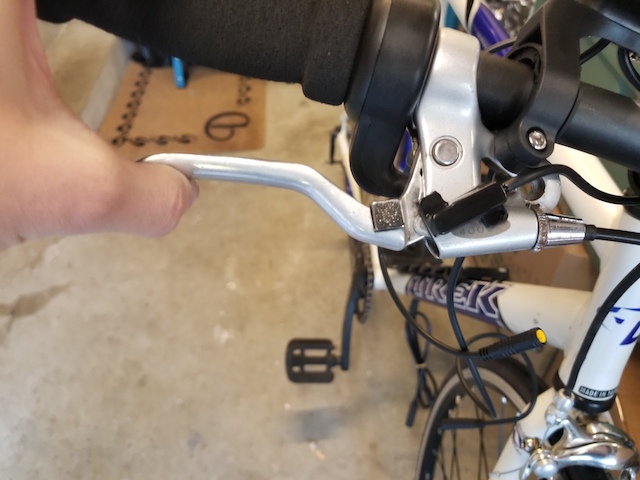
Now that everything was mounted on the handlebars, I reinstalled the brakes and added the e-brake sensors. These are so cool; just a simple magnetic sensor mounts on the brake harness and a magnet attached to the lever “tells” the controller when the brake is engaged, which disengages the throttle. Simple physics, but oh so awesome!
Step 4: Pedal Assist Module and Sensor
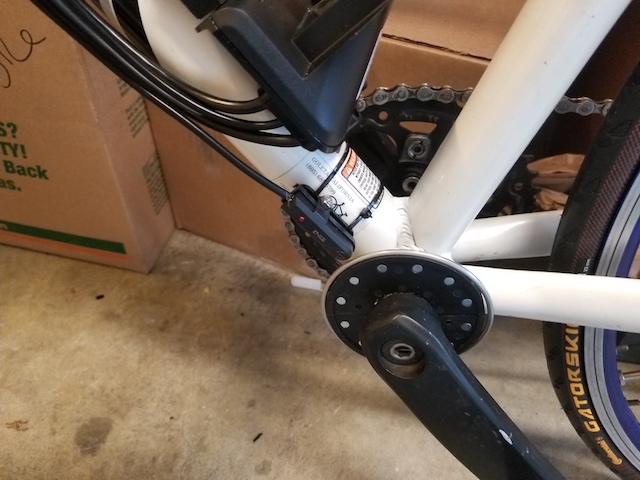
This part required snipping and filing of the plastic ring that goes around the base of the left pedal crankshaft. This was more time-intensive than I would have thought. It took me about 15 minutes of filing, test, more filing to get the fit right. After wrapping the ring with the provided metallic hoop, I mounted the sensor to the frame with a zip-tie.
Quick note: the design of this component is actually quite brilliant. Rather than having to take the crank assembly apart to put the ring on, I was able to just snap the part on.
Step 5: Mounting the Battery and Wiring

The battery has a locking mechanism that prevents theft. This is a pretty nice feature. The power switch does not have a secure on/off mechanism, so some unscrupulous individual could drain your battery while you are away from your bike.
Tidying up the wiring is highly personal. I chose a balance between aesthetic appeal and concern for safety. Basically, I wanted a configuration that
- left enough slack for full range of motion of the handlebars without excessive strain on mounts
- was visually appealing
Step 6: Adjustment
As with any major modifications to a bicycle, the final step is to readjust your brake alignment and tension, pump the wheels to recommended pressure, ensure the wheels spin freely, etc… Gratefully, this was all I had to do before going on a test ride.
The post-op on the test ride made something very clear: the old seat had to go. Replacing it added another $60 to the total. Oh well. It’s totally worth it to not dread sitting on the bike each and every time that I ride it.
Test Ride
Check this out!
I’ve had a chance to put about a dozen or so miles on the bike now and it has, thus far, exceeded my expectations. The bike grinds up most hills I have encountered, which is key, because where we just moved, there are a bunch of hills. Even the worst of them can be taken with only minor pedal assistance on my part.
Total Cost
All-in, building an electric bike from a conversion kit cost, including the bike off Craig’s List, $1,077. This was within the $1,000 +/- $100 budget that I set.