Virtual Makeup Project Writeup
Introduction
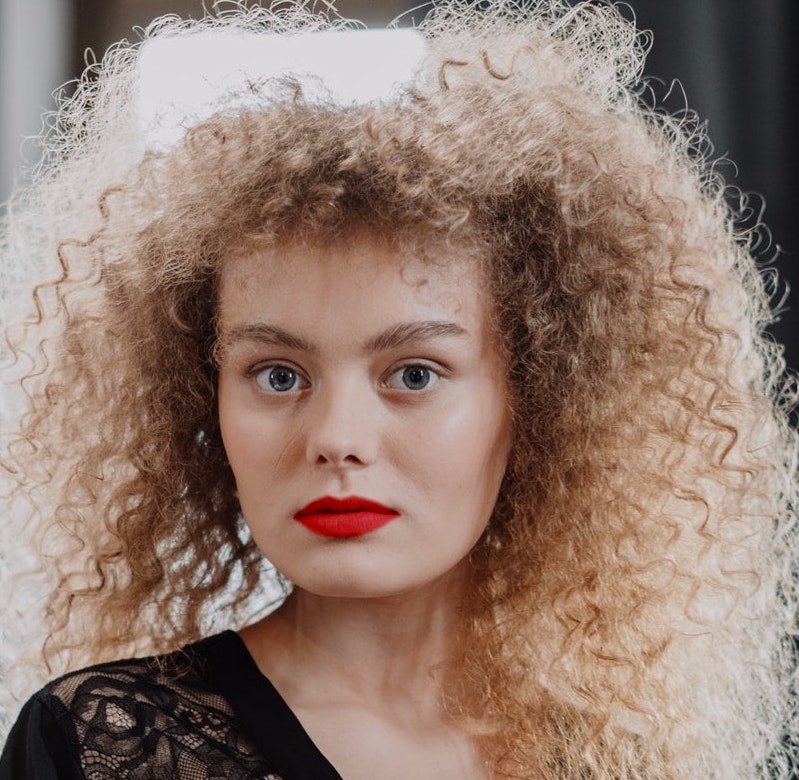
I am currently enrolled in the OpenCV course “Computer Vision II: Applications (C++)”. For the first project, I had to implement two personal “improvement” features to be applied to a test image (shown below):

In this blog post, I present the writeup for the project.
Writeup
For my two features, I chose to implement virtual lipstick application and virtual blush application. I will present a walkthrough of the rationale and solution for each feature in subsections below. In each subsection, I will discuss the problem statement, background research I conducted before attempting a solution, and the final solution.
Feature 1: Virtual Lipstick
The point of this feature is to implement a natural-looking overlay of a user-defined lip color applied to the test image shown above. “Natural-looking” is the important part of the previous sentence: the variation in luminance in the new image with lipstick applied should be consistent with the original image.
Before beginning, I did a bit of research to find starting reference material to help me think about the problem. The first reference I found was this. In this post, I found a brief description of a competition-winning project, AutoRetouch, which introduced a lipstick application approach with a very good example of the application showing a near-seamless application of a different shade of lipstick applied to a test image, with both before and after photos for comparison. The description of the application stated:
This algorithm automatically created a lip mask based on the facial landmark detected using Dlib’s model. Naively blending color on top of the lips does not produce good results, and so he manipulated the chroma components of color while keeping luminance constant.
So, the key takeaways from this for me were:
- Use Dlib’s facial landmark model to build a lip mask
- Use colorspace conversion to transform the problem to a colorspace where luminance and chroma components of color can be manipulated instead of BGR colors
Next, I thought about what the right rule for transforming lip pixels from the test image would be to ensure that the transformation looked natural. In other words, I wanted to find a reference that could help to explain to me how to preserve the underlying variation in the original test image despite doing color modifications in the output image. While searching, I found this article from PyImageSearch about color transfer between images. This article is great because it outlines a sequence of steps for doing the color conversion (to the L*a*b* colorspace). Particularly useful were Steps 6 and 7:
Step 6: Scale the
targetchannels by the ratio of the standard deviation of thetargetdivided by the standard deviation of thesource, multiplied by thetargetchannels.Step 7: Add in the means of the L*a*b* channels for the
source.
I found this approach to be really interesting and useful in the current context because it discusses an approach for taking the desired target channel intensities at each pixel and scaling/translating them to better match the source channel intensities. The application described is different than my desired application, however I was able to pull out the following for my solution:
- I only care about changing the pixel values corresponding to the lips in the target image, so after creating a lip mask, I will compute the statistics (mean and standard deviation) on only the lip pixels in the test image (converted to an alternate colorspace with luminance channel)
- The color I want to apply is constant (just some BGR value corresponding to lipstick color) - so the standard deviation in my target will be 0. I only need to consider variation in the test image, not in the shade of lipstick applied over the lip mask.
From these takeaways, I was able to put together a solution that created the following output image (from the initial test image shown above):
I’ll now discuss the solution in more detail.
Solution
The process flow I followed was quite simple:
- Construct a binary image mask using Dlib’s facial landmark detector and the
fillPolymethod from OpenCV - Blur the mask to soften the transition from pixels adjacent to the lips to the lips, themselves
- Convert test image to alternate colorspace, compute statistics on lip pixels, and then use those statistics to transform the desired lipstick color to a natural embedding for the test image
I’ll discuss each of these approaches in more detail:
Identify lip pixels
There were several examples in the first two weeks of the course that showed how to setup a Dlib facial landmark detector, so I reused some of that code as a starting point. After running the facial landmark detector on the test image, I was able to pass those landmark points, along with the original image, to create a mask denoting the lip pixels in the target image with the following source code:
void computeLipMask(cv::Mat const &im, full_object_detection const &landmarks, cv::Mat &mask) {
  std::vector <cv::Point> points;
  for (int i = 0; i <= landmarks.num_parts(); ++i)
  {
      points.push_back(cv::Point(landmarks.part(i).x(), landmarks.part(i).y()));
  }
  // top
  std::list<size_t> indicesTop = {64, 63, 62, 61, 60, 48, 49, 50, 51, 52, 53, 54};
  std::vector<cv::Point> pointsTop;
  for (auto const &i : indicesTop) {
    pointsTop.emplace_back(points[i]);
  }

  // bottom
  std::list<size_t> indicesBottom = {54, 55, 56, 57, 58, 59, 48, 60, 67, 66, 65, 64};
  std::vector<cv::Point> pointsBottom;
  for (auto const &i : indicesBottom) {
    pointsBottom.emplace_back(points[i]);
  }
  std::vector< std::vector<cv::Point> > polys = { pointsTop, pointsBottom };
  cv::fillPoly( mask, polys, 255);
  return;
}
In the source code above, I created two masks: one for the top lip and one for the bottom. These two polygons were created by tracing the points clockwise around each lip contour. fillPoly takes in a std::vector of a std::vector of cv::Point objects and the resulting output is the desired mask.
Soften the transition from lip to non-lip (and vice-versa)
The binary mask created in the last step will most likely lead to a very dramatic transition around the lip boundary. Because a major goal of this application is natural-looking output, I want to blur the mask to allow non-zero contribution of the desired lip color to pixels just outside the lip boundary. Moreover, I would like to have the transition to inside the lip region from outside to be smooth across the boundary. I decided the best way to achieve this would be to apply a Gaussian blur to the binary mask found in the previous step. Here’s the code:
void blurLipMask(cv::Mat &mask, cv::Size const &size = cv::Size(0, 0)) {
  if (size.height == 0 || size.width == 0) return;
  auto maskCopy = mask.clone();
  cv::Mat blurMask;
  cv::GaussianBlur(mask, blurMask, size, 0);
  blurMask.convertTo(mask, CV_32F, 1./255);
}
This code is very simple. The default value for the blur kernel size is (0, 0), which means that no blur will be applied; i.e. the “blurred” mask will be the same as the original binary mask. However, if the user passes a non-trivial kernel size, a blurred mask, scaled to a floating point value in the interval [0, 1], is returned by reference via the mask variable. Now, we have a non-binary mask that can be used to smooth the transitions.
Apply lipstick
There are a few steps that I followed for applying the lipstick. I will present the source code implementation, which has these steps outlined in commented blocks. I will explain each step block-by-block.
void applyLipstick(cv::Mat &im, cv::Mat const &mask, cv::Scalar const & color) {
  // "color" is the BGR value of the desired lipstick shade
  // STEP 1: get YCrCb decomposition of input image and desired lip color
  // STEP 1.1: input image
  cv::Mat imClr;
  cv::cvtColor(im, imClr, cv::COLOR_BGR2YCrCb);
  cv::Mat imClrFlt;
  imClr.convertTo(imClrFlt, CV_32FC3, 1. / 255);

  // STEP 1.2: desired lip color
  auto convertColor = [&]() {
    cv::Mat YCrCb;
    cv::Mat BGR(1, 1, CV_8UC3, color);
    cv::cvtColor(BGR, YCrCb, cv::COLOR_BGR2YCrCb);
    cv::Mat YCrCbflt;
    YCrCb.convertTo(YCrCbflt, CV_32FC3, 1./255);
    return YCrCbflt.at<cv::Vec3f>(0, 0);
  };
  auto lipstickYCrCb = convertColor();

  // STEP 2: compute weighted mean of lip pixels in YCrCb colorspace
  auto m = maskedMean(imClrFlt, mask);

  // STEP 3: apply alpha blending to pixels with non-zero value in the mask
  // this alpha blending utilizes the following scheme:
  // - apply weight (equal to the mask pixel value) to the desired YCrCb lip color + a translation that incorporates variation in the source image
  // - apply weight (equal to 1 - mask pixel value) to the original pixel in the source image transformed to YCrCb colorspace
  for (size_t i = 0; i < imClrFlt.rows; ++i) {
    for (size_t j = 0; j < imClrFlt.cols; ++j) {
      auto mpxl = mask.at<float>(i, j);
      if (mpxl > 0) {
        auto &srcPxlClr = imClrFlt.at<cv::Vec3f>(i, j);
        for (size_t idx = 0; idx < 3; ++idx) {
          srcPxlClr[idx] = mpxl * ( lipstickYCrCb[idx] + (srcPxlClr[idx] - m[idx]) ) + (1. - mpxl) * srcPxlClr[idx];
        }
      }
    }
  }

  // STEP 4: convert transformed image back to BGR and change depth to 8-bit unsigned int
  cv::Mat imFlt;
  cv::cvtColor(imClrFlt, imFlt, cv::COLOR_YCrCb2BGR);
  imFlt.convertTo(im, CV_8UC3, 255);
  return;
}
Step 1 is pretty trivial: using OpenCV’s built-in colorspace conversion routines, I was able to efficiently convert the source image and the target lip color to Y*Cr*Cb*. The only thing worth noting here is the convertColor lambda created to convert a single cv::Scalar. From some StackOverflow searches, this seemed the best way to accomplish the desired conversion, but it still seems a little inefficient having to create a 1x1 image, transform it to the desired colorspace, and then return the first pixel channel values for the transformed color. Why choose Y*Cr*Cb* you might ask? Simple: the hint from the first reference I found suggested that the AutoRetouch approach might have used this colorspace to achieve its impressive results.
Step 2 requires some discussion. I wanted to match the underlying distribution of lip pixels in the test image exactly in the output image: i.e. if a pixel is 2 standard deviations from the mean value for lip pixels in the source image, I want that same pixel in the output image to be 2 standard deviations from the now new mean value (determined by the desired lip color). As you’ll see above, there is no standard deviation being calculated or used. Don’t we need the standard deviation? The answer is “no”; because I am targeting the same standard deviation over lip pixels in the output image as for the test image, the standard deviation is not used at-all by this approach. For some justification about why this should work, you can check out Steps 6 and 7 from the source that I referenced above. Because the test and output image standard deviations are the same, the scaling to be applied is unity, so the standard deviation does not need to be computed. To compute the mean, I implemented the maskedMean function below:
auto maskedMean = [](cv::Mat const &img, cv::Mat const &mask) {
  cv::Vec3f out(0, 0, 0);
  float N = 0;
  for (size_t i = 0; i < img.rows; ++i) {
    for (size_t j = 0; j < img.cols; ++j) {
      auto mpxl = mask.at<float>(i, j);
      if (mpxl > 0) {
        N += mpxl;
        cv::Vec3f pxl = img.at<cv::Vec3f>(i, j);
        for (size_t idx = 0; idx < 3; ++idx) {
          out[idx] += mpxl * pxl[idx];
        }
      }
    }
  }
  return out /= N;
};
Looking at the implementation, you can see that this is not a standard mean calculation but rather a weighted mean. A weighted mean is appropriate in this context because of the choice of blurred mask to smooth the transition from non-lip to lip pixels.
Step 3 is the crucial step as I actually transform the pixels here. I apply a simple alpha blending scheme with a twist in the way that the alpha-part is computed. The alpha-part in the update comes from the mask weight times the mean-shifted test image lip pixel translated by the desired lip color. This is a bit of a mouthful, I know, but the gist is that I am trying to maintain the statistical distributions of all of the Y*Cr*Cb* channels in the test image, but just translated to the new desired lipstick color. The (1-alpha)-part in the alpha-blending comes from original test image pixel, itself. Note that when the mask gives weight near 1, nearly all of the pixel’s channel values will come from the translated lipstick channel values, whereas when the weight is near 0, nearly all of the values will come directly from the unaltered test image pixel.
Step 4 just does the transformation back to the BGR colorspace and rescales the image to a 3-channel image with unsigned 8-bit depth in each channel.
Discussion
To see how this approach works in practice, just look at the image shared just before the solution discussion. For that image, a lipstick shade of (B,G,R) = (0, 0, 155) was chosen. The solution looks very natural; lower luminance values from the original image and preserved in the output image (see the creases in the lips, for one, as well as the corners). The transition from non-lip to lip looks very smooth; there is no hard line present.
What I found while tuning the blur kernel size and evaluating the effect of the weighted vs. non-weighted mean approach, I found that both blurring and the kernel size were crucial in making the final image look as natural as possible. Once I had the blur, the weighted mean allowed me to smooth the transition in a way that resulted in a nearly-seamless application of lipstick to the original image. In my opinion, compared to AutoRetouch, the results shown compare quite favorably.
Feature 2: Virtual Blush
As in the case of the Virtual Lipstick feature implementation, the object of the Virtual Blush feature is to naturally apply blush to a face in an input image.
The virtual lipstick feature implementation worked suprisingly well, so I wanted to use the same core approach for blending a target color over a masked region in the image. The problem then became: how to construct the region-of-interest (ROI) for the mask?
I know next-to-nothing about makeup, in general. Before diving too deep, I wanted to gain some insights about blush application. I went through some articles on websites for popular magazines and lifestyle companies. One article I found interesting (and humbling) was this one. Step 5 in the article showed women with multiple different face shapes and, for each face shape, there was a different (and nonlinear) strategy for blush application! It was at this point that I realized that the likelihood of coming up with a one-size-fits-all approach was small. Rather than trying to find such a solution, I resolved to create a well-reasoned, generic approach to solving the problem. I discuss my solution below.
Solution
I start by stating the following heuristics:
- (H1) The focal point of blush application is the cheek center
- (H2) The intensity of blush observed falls off proportionally with distance from cheek center
- (H2.1) Moreover, there is an axis-of-symmetry about which that intensity falls off
- (H3) As in the Virtual Lipstick case, the distribution of color around a mean should match between input and output images, with the output image’s color component being modified to a desired blush color
I used the above heuristics to shape the following algorithm to solve the problem at-hand:
- For each of the right and left cheeks:
- Identify an ROI using facial landmarks and compute its centroid (addresses H1)
- Create a Gaussian mask with size determined by some fraction of ROI from above (addresses H2)
- Project Gaussian mask onto ROI from above (also addresses H2)
- To apply blush: the approach that follows matches the Virtual Lipstick implementation closely
- Convert test image to alternate colorspace
- For each cheek
- compute statistics on cheek pixels, and then use those statistics to transform the desired blush color to a natural embedding for the test image (addresses H3)
- For each cheek
- Convert test image to alternate colorspace
The first major bullet of the solution is implemented in the function computeCheekMasks and the second major bullet is implemented in the function applyBlush. The source code for each function is included below for reference as you read through the remainder of the page.
void computeCheekMasks(cv::Mat const &im, full_object_detection const &landmarks, std::vector<cv::Mat> &masks,
    std::array<float, 2> const &boxRatio, std::array< std::array<float, 2>, 2 > const &kernelRatio, float const &maskThresh) {
  masks.clear();

  // create points array with points from facial landmark detector
  std::vector <cv::Point> points;
  for (int i = 0; i <= landmarks.num_parts(); ++i)
  {
      points.push_back(cv::Point(landmarks.part(i).x(), landmarks.part(i).y()));
  }

  // find centroid of each polygon in the mask
  auto findCentroid = [](std::vector<cv::Point> const &points) {
    auto m = cv::moments(points);
    return cv::Point(m.m10 / m.m00, m.m01 / m.m00);
  };

  // find dimensions (height, width) of rectangle containing input points
  auto heightWidth = [](std::vector<cv::Point> const &points, int &h, int &w) {
    h = 0;
    w = 0;
    for (int i = 0; i < points.size(); ++i) {
      for (int j = i+1; j < points.size(); ++j) {
        auto wc = std::abs(points[i].x - points[j].x);
        auto hc = std::abs(points[i].y - points[j].y);
        if (hc > h) h = hc;
        if (wc > w) w = wc;
      }
    }
    return;
  };

  // right keypoint indices from landmark detector
  std::list<size_t> indicesRight = {35, 16, 12};

  // left keypoint indices from landmark detector
  std::list<size_t> indicesLeft = {31, 4, 0};

  std::vector< std::list<size_t> > indices = { indicesRight, indicesLeft };

  // for each set of indices:
  //   1) create keypoints array (keypoints come from the facial landmark detector)
  //   2) compute centroid of polygon created in 1) and add it to the array
  //   3) compute height and width of ROI rectangle containing keypoints
  //   4) create a square region around polygon centroid with dimensions defined by input boxRatio - on interval (0, 1]
  //   5) create a Gaussian kernel over square created in 4) with input standard deviation defined by input kernelRatios
  //   6) normalize and apply input threshold to 5)
  //   7) setup source and target points for homography estimation
  //   8) compute homography
  //   9) apply homography to normalized kernel from 6)
  //   10) append mask to masks

  size_t i = 0;  // loop counter - 0: right, 1: left
  for (auto const &ids : indices) {
    // 1)
    std::vector<cv::Point> pts;
    for (auto &i : ids) {
      pts.emplace_back(points[i]);
    }

    // 2)
    auto centroid = findCentroid(pts);
    pts.emplace_back( centroid );

    // 3)
    int width, height;
    heightWidth(pts, height, width);

    // 4)
    int side = static_cast<int>(boxRatio[i] * std::min(width, height));
    if (side % 2 == 0) ++side;  // make sure that side is odd for the kernel construction
    cv::Mat mask = cv::Mat::zeros(side, side, CV_32F);

    // 5)
    // Note: the Gaussian kernel is constructed by applying a Gaussian blur to a 2D delta function (all zeros except at the center, which is 1)
    int midpoint = (side - 1) / 2;
    mask.at<float>( midpoint, midpoint ) = 1.;

    // see https://docs.opencv.org/2.4/modules/imgproc/doc/filtering.html?highlight=gauss#getgaussiankernel
    // - the function for computing the sigmas comes from there
    double kernelSigmaX = kernelRatio[i][0] * ( 0.5 * (static_cast<double>(side) - 1.) - 1. ) + 0.8;
    double kernelSigmaY = kernelRatio[i][1] * ( 0.5 * (static_cast<double>(side) - 1.) - 1. ) + 0.8;
    cv::Mat kernel = cv::Mat::zeros(side, side, CV_32F);

    // compute the kernel
    cv::GaussianBlur(mask, kernel, cv::Size(side, side), kernelSigmaX, kernelSigmaY, cv::BORDER_ISOLATED);

    // 6)
    double maxVal, minVal;
    cv::Point maxLoc, minLoc;
    cv::minMaxLoc( kernel, &minVal, &maxVal, &minLoc, &maxLoc );
    cv::Mat normKernel = kernel.clone();
    kernel.convertTo(normKernel, CV_32F, 1. / maxVal, -maskThresh);

    // the rationale here for the remainder of the loop iteration is to map 4 keypoints from the normed
    // kernel onto the 4 landmark points for the cheek
    // the 4 keypoints of the normed kernel image are
    //  * the top-left
    //  * the top-right
    //  * the center
    //  * the bottom-center

    // 7)
    std::vector<cv::Point2f> srcPoints = { cv::Point2f(midpoint, side-1), cv::Point2f(0, 0),
      cv::Point2f(side-1, 0), cv::Point2f(midpoint, midpoint) };
    std::vector<cv::Point2f> tgtPoints;
    for (auto &p : pts) {
      tgtPoints.emplace_back(cv::Point2f(p.x, p.y));
    }

    // 8)
    auto homography = cv::findHomography(srcPoints, tgtPoints);

    // 9)
    cv::Mat warpedMask = cv::Mat::zeros(im.rows, im.cols, CV_32F);
    cv::warpPerspective(normKernel, warpedMask, homography, warpedMask.size());

    // 10)
    masks.emplace_back(warpedMask);

    ++i;  // increment the loop counter
  }

  return;
}

void applyBlush(cv::Mat &im, std::vector<cv::Mat> const &masks, cv::Scalar const &color) {
  auto fwd = cv::COLOR_BGR2YCrCb;
  auto bkwd = cv::COLOR_YCrCb2BGR;

  // "color" is the BGR value of the desired blush shade
  // STEP 1: get "fwd" decomposition of input image and desired blush color
  // STEP 1.1: input image
  cv::Mat imClr;
  cv::cvtColor(im, imClr, fwd);
  cv::Mat imClrFlt;
  imClr.convertTo(imClrFlt, CV_32FC3, 1. / 255);

  // STEP 1.2: desired blush color
  auto convertColor = [&]() {
    cv::Mat outClr;
    cv::Mat BGR(1, 1, CV_8UC3, color);
    cv::cvtColor(BGR, outClr, fwd);
    cv::Mat outClrFlt;
    outClr.convertTo(outClrFlt, CV_32FC3, 1./255);
    return outClrFlt.at<cv::Vec3f>(0, 0);
  };
  auto blushClr = convertColor();

  for (auto &mask : masks) {
    // for each mask in masks, execute the following steps
    // - this ensures that local statistics are used for each mask region instead of including both in a single mask
    // STEP 2: compute weighted mean of cheek pixels in HSV colorspace
    auto m = maskedMean(imClrFlt, mask);  // SAME AS IMPLEMENTATION USED FOR VIRTUAL LIPSTICK FEATURE

    // STEP 3: apply alpha blending to pixels with non-zero value in the mask
    // this alpha blending utilizes the following scheme:
    // - apply weight (equal to the mask pixel value) to the desired YCrCb lip color + a translation that incorporates variation in the source image
    // - apply weight (equal to 1 - mask pixel value) to the original pixel in the source image transformed to YCrCb colorspace
    for (size_t i = 0; i < imClrFlt.rows; ++i) {
      for (size_t j = 0; j < imClrFlt.cols; ++j) {
        auto mpxl = mask.at<float>(i, j);
        if (mpxl > 0) {
          auto &srcPxlClr = imClrFlt.at<cv::Vec3f>(i, j);
          for (size_t idx = 0; idx < 3; ++idx) {
            srcPxlClr[idx] = mpxl * ( blushClr[idx] + (srcPxlClr[idx] - m[idx]) ) + (1. - mpxl) * srcPxlClr[idx];
          }
        }
      }
    }
  }

  // STEP 4: convert transformed image back to BGR and change depth to 8-bit unsigned int
  cv::Mat imFlt;
  cv::cvtColor(imClrFlt, imFlt, bkwd);
  imFlt.convertTo(im, CV_8UC3, 255);

  return;
}
I’ll now discuss the algorithm in more detail.
Identify an ROI
For the ROI construction, I referred back to the 68-point facial landmark detector from dlib. Unfortunately, there is no cheek center landmark. This presented a minor bump which I was able to overcome by observing the following: the cheek region for both right and left cheeks can be approximated by a triangle whose vertices come from particular landmark points.
Once the triangle defined by these three points was constructed, it was really easy to find the centroid; it is just the arithmetic center of the triangle. The image with the triangle vertices and centroid highlighted for both the right and left cheek regions is shown below:

Using these keypoints, I then created a Gaussian mask that I could project onto the original image to define a region to apply the blush to. This is conceptually very similar to the approach taken for the Virtual Lipstick feature implementation, with the additional complexity that a circular (or elliptical) Gaussian kernel mask applied to either cheek would look really unnatural. The reason for this unfortunate fact is that naive application of a Gaussian mask around the cheek centers won’t match head pose or contour of the face in the original image. I still like the idea of a Gaussian - it gives me a mechanism for addressing heuristics H2 and H2.1 above about symmetry. This led me to the following idea: the axis-of-symmetry for blush application can be naturally embedded onto the 2D projected face shape by means of a projective transformation (homography).
The specifics of the homography are quite simple. The three vertices of the triangle plus the triangle center for each cheek region gives 4 points to match in the output image. The source points of the homography are: the top-left, top-right, center, and the bottom-center. These points can be seen to map quite naturally onto the keypoints in the image shown above. The result of this approach leads to the following representative set of masks for the original image:

I said representative in the previous sentence because the set of parameters used are just one of a continuum of possibilities. To add more flexibility to the approach, I added the following configurable parameters:
- Box ratio: this ratio defines how big the rectangular ROI around each cheek center will be (compared to the minimum of height and width of the full cheek rectangular ROI)
- Kernel ratios: these multipliers define the xy spread of the Gaussian kernel to be used as mask
- Mask threshold: floating point threshold value below which to zero out values from the Gaussian mask
At this point, I have a configurable approach to constructing masks for the right and left cheek regions. This is all I need to apply the method from the Virtual Lipstick feature implementation described above.
Apply blush
I won’t repeat verbatim the rationale for method chosen to apply the blush; you can go back to Step 3 from the Virtual Lipstick section of this page for a refresher. The only difference in this approach is that there are now 2 masked regions that need to be iterated over separately. In order to match statistics of the input and output images, each masked cheek region needs to be processed separately to give the most natural-looking output image. Moreover, because the face in the input image is not symmetric, some separate tuning of mask ROI size and Gaussian kernel spread was required.
After a few rounds of tuning, here’s the resulting output image:
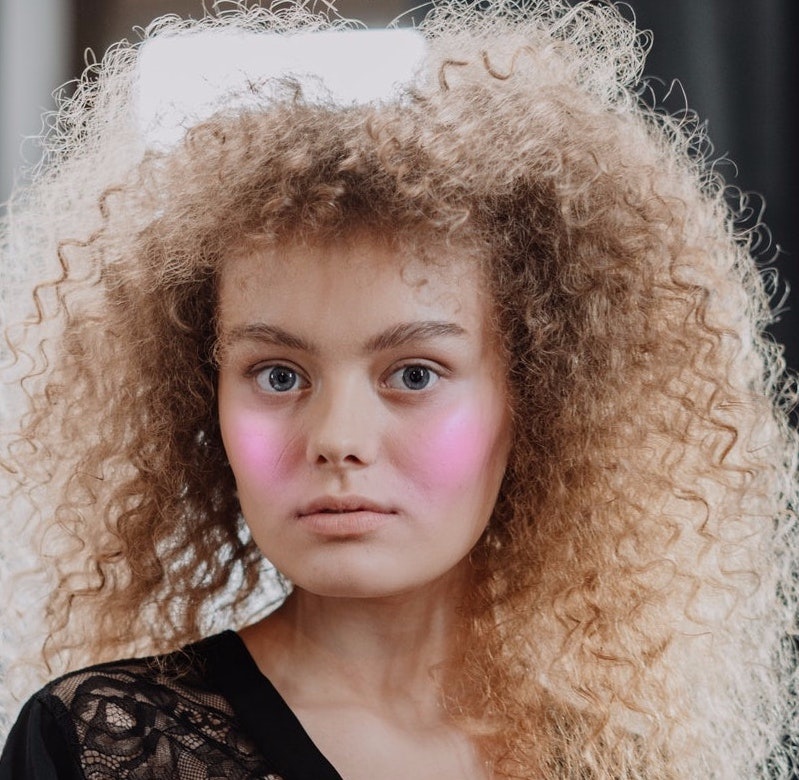
Discussion
This feature implementation did not go as well as I would have hoped. In the resulting image, there are some visible artifacts of the mask application shown around the cheek contours. In hindsight, there are a lot of image-specific components (like head pose, lighting, skin tone, face shape, etc…) that make blush application quite difficult. The approach I came up with, though demonstrably imperfect, was a good attempt at a solution under the circumstances. I know that I could have tweaked the approach to gain some minor improvements on the input image provided however, in the broader scope of the task, this would not have necessarily led to general improvements in the algorithm’s performance when applied to new images.
Some thoughts on tuning:
- Increasing the mask threshold made transitions less smooth, which makes sense intuitively. If there is a cutoff-value and an abrupt transition from 0 to that cutoff-value in the mask, there will be a step discontinuity in the target image. In practice, it seems best to just leave the mask threshold set to 0.
- The Gaussian mask width and height need to be chosen carefully to reflect the head pose in the image. When the aspect ratio (y/x) is high in the input image, the kernel height should be the same size or a little larger than the kernel width. When the aspect ratio is low, the opposite advice applies.
- It appears better to only tune the box ratio and to set the mask width and height based on the aspect ratio heuristic mentioned in the previous bullet point. The box ratio of less than 0.5 seems appropriate, with values closer to 0.5 being more applicable to smaller cheek ROI and smaller values being more applicable to larger cheek ROI.
Final Remarks
The Virtual Lipstick feature implementation went really well. The resulting image after applying the solution looks very natural.
I am not so pleased with the Virtual Blush feature implementation. Not only was the solution for the Virtual Lipstick feature simpler, it seems to have performed significantly better with less configuration parameters to tune. The problems with Virtual Blush seem to have started from the very beginning with the ROI construction. I suppose I could have identified better heuristics for determining cheek center (including landmarks from the eyes or jaw, perhaps). The choice of Gaussian kernel for the mask, and the subsequent projection of those mask keypoints onto the facial landmarks, could also have been improved; the projection of this approach fails to capture the natural warping of the Gaussian mask around 3D contours of the cheek and face.
All things considered, I think that the two approaches outlined in this post are pretty good in that they present well-reasoned and decently performant solutions to the problems presented. I learned a lot while doing this project. However, I’m hoping that future projects will be more focused on spatial reasoning about images (keypoints, 3D reconstruction, AR/VR) and less focused on cosmetics and Snapchat filters ![]()
Thanks for reading!